FA-VA6 Firmware Update 2.0
Firmware 2.0 for the FA-VA6
The firmware of the FA-VA6 has been optimized and expanded with numerous new functions that are available with firmware update 2.0 for all FA-VA6 devices.
New features and optimizations
- New application "6-Band SWR" for easier tuning of multiband antennas, which graphically displays the SWR across the entire band for six freely selectable frequency bands.
- Five new interactive calculators for standing wave ratio, power, decibels, wavelength, and wave velocity.
- Support for screen mirroring and screenshots with PC programs.
- Additional languages: French, Italian, and Spanish.
- Reference traces in multi-frequency mode.
- Axis values for the Smith chart in multi-frequency mode.
- Auto-scaling of traces in multi-frequency and TDR mode.
- Saving of measurement data in TDR mode.
- Section display in TDR mode, which shows the position of the selected section within the overall data.
- Additional "Return loss" view in single-frequency mode.
- New option for a very high measurement rate in single-frequency mode.
- Selection of frequency bands also in single-frequency mode.
- Display of start and stop frequencies of frequency bands directly during selection.
- Display of measurement details also in the 5-Frequency SWR and 6-Band SWR applications.
- New option for a higher measurement rate in the 5-Frequency SWR application.
- In addition to the two existing appearance profiles, a new appearance profile has been added which combines clearly distinguishable colors with pleasant shades of gray.
- Simplified entry of frequencies in kHz and MHz.
- Additional cable types available for selection.
- Flashlight function.
- Optimization of system-wide display of numbers and units for better readability.
- Optimization of internal processing for an even faster and improved user interface.
- Minor bug fixes.
Firmware 2.0 installation
To install the firmware 2.0 on the FA-VA6, programs for the common operating systems Windows, macOS, and Linux are available under Downloads. In addition to a graphical user interface (GUI) program for Windows, command-line programs (CLI) are also available for all operating systems.
The installation is very simple: The FA-VA6 has to be connected to a PC via a USB cable. After downloading and starting the installation program, the connected FA-VA6 is automatically detected and, after confirmation, the new firmware is installed. All settings, saved measurement data and calibrations, including the factory calibration, are preserved.
If the installation is interrupted (for example, by accidentally unplugging the USB cable), the FA-VA6 cannot be damaged and the installation can be restarted.
Even if firmware 2.0 is already installed on the connected FA-VA6, it can be reinstalled as often as desired.
Step-by-step installation on Windows (GUI)
After
downloading and starting the program "FA-VA6_Firmware_Update_2-0_Windows_GUI.exe" Windows may ask whether the unrecognized program should be run, which must be confirmed by clicking "More info" and "Run anyway".


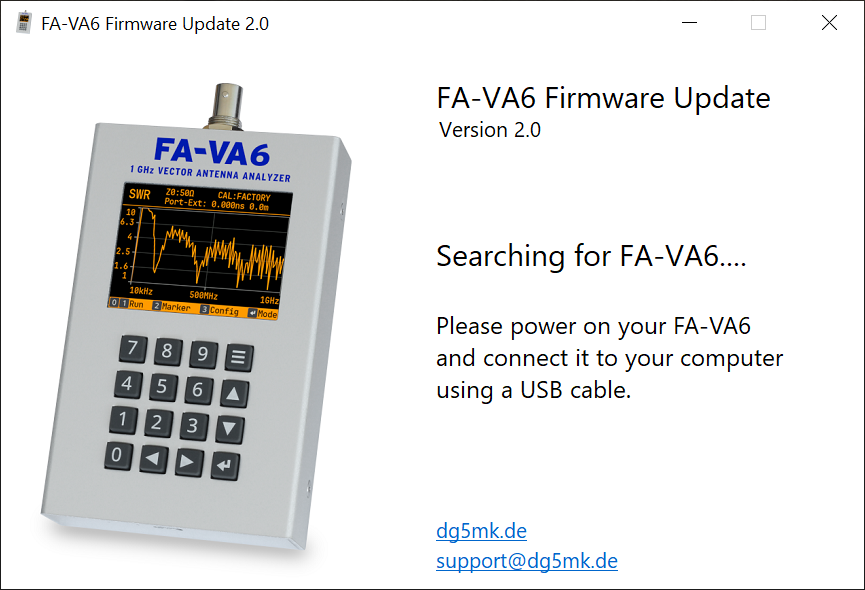
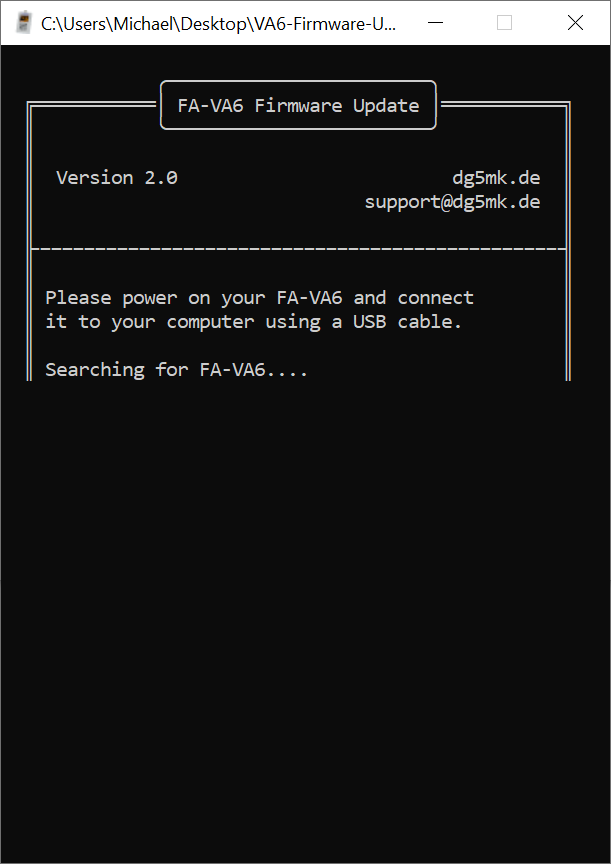
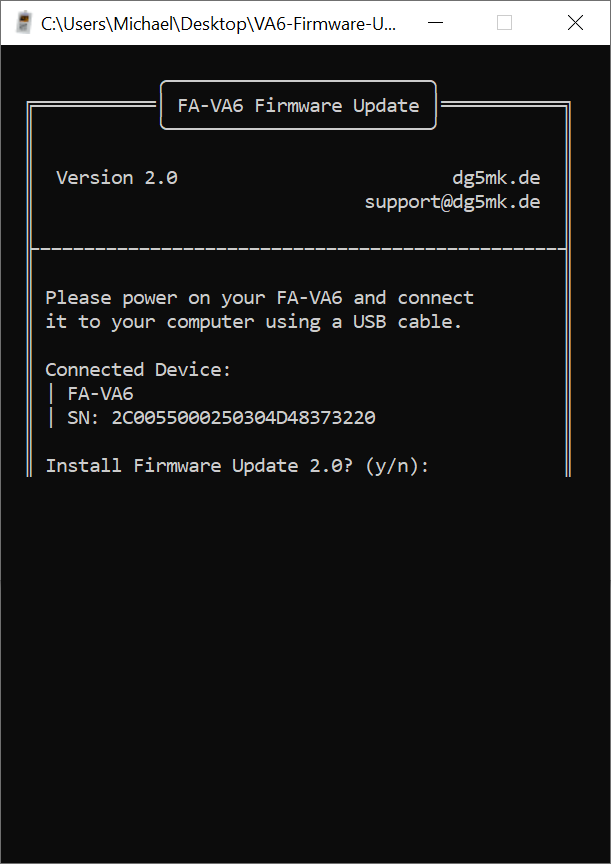
The installation program now actively searches for a connected FA-VA6. After the FA-VA6 is connected to the PC via a USB cable, it is automatically detected and the installation can be started.
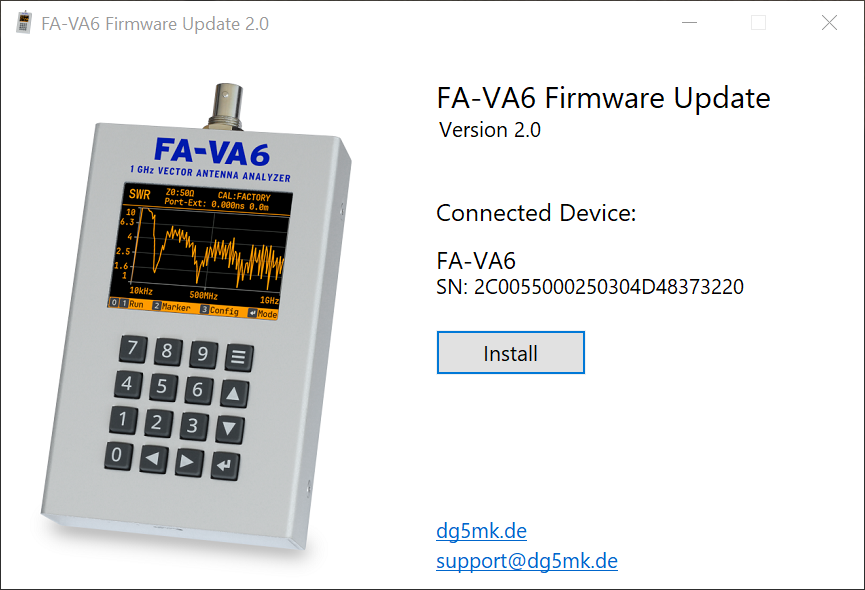
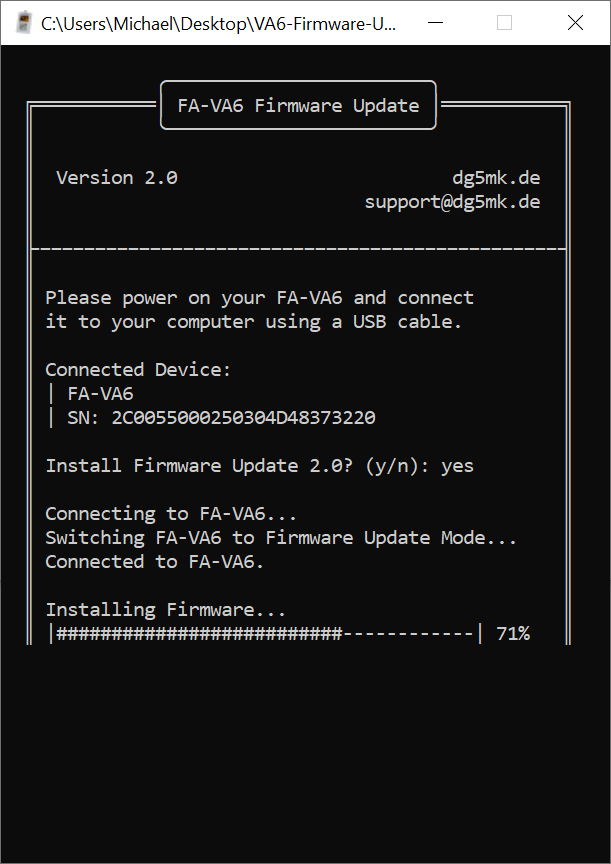
After clicking "Install" the firmware installation begins. The installation process only takes a few seconds; a progress bar shows the current status.
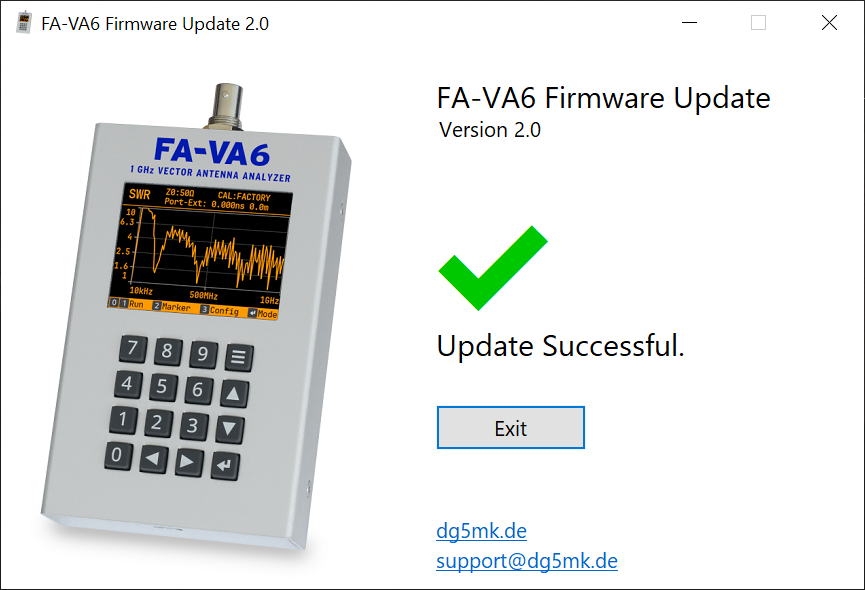
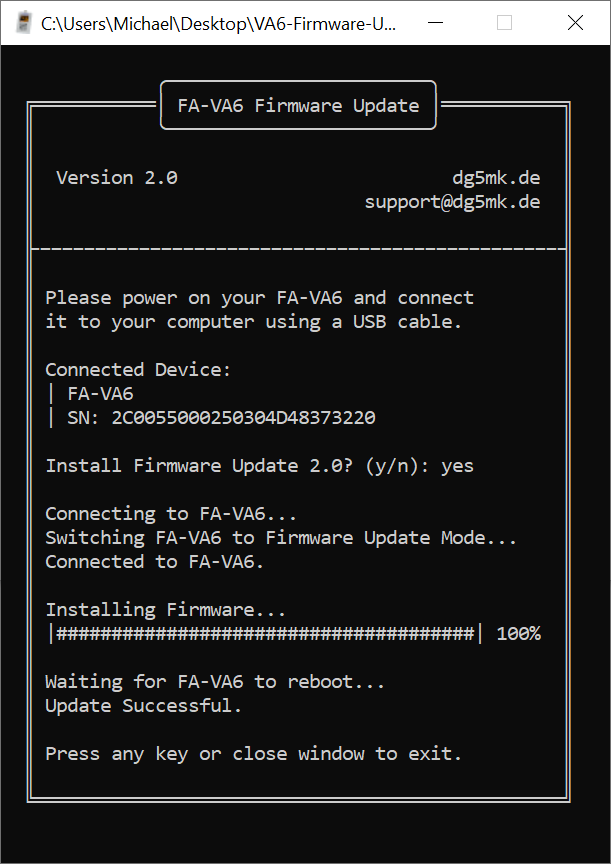
The successful installation is confirmed by a corresponding message, after which the FA-VA6 is ready for use with the new firmware 2.0 and the installation program can be closed.
On the FA-VA6 itself, a corresponding confirmation may also be displayed, for example when updating the firmware from version 1.0 to version 2.0.

Step-by-step installation on Windows (CLI)
Alternatively, the firmware installation can be carried out using a command-line program. After
downloading the program "FA-VA6_Firmware_Update_2-0_Windows_CLI.exe", it is either started by double-clicking, or from a command prompt window.
The installation program now actively searches for a connected FA-VA6. After the FA-VA6 is connected to the PC via a USB cable, it is automatically detected and the installation can be started.
By entering "y" (for "Yes") the installation is started. With "n" (for "No") the installation could be canceled instead.
The installation process only takes a few seconds; a progress bar shows the current status.
The successful installation is confirmed by a corresponding message, after which the FA-VA6 is ready for use with the new firmware 2.0 and the installation program can be closed by pressing any key.
On the FA-VA6 itself a confirmation of the firmware update may also be displayed, for example when updating from firmware version 1.0 to version 2.0.
Installation on macOS (CLI)
For the macOS operating system the program "FA-VA6_Firmware_Update_2-0_macOS_CLI.tar.gz" can be downloaded and used.
After downloading the archive must be extracted in the Downloads folder by double-clicking it. The program, now extracted next to the archive, can be started with a double-click. macOS may initially block execution with a warning about an unknown program; this message must be confirmed with "Done". In the settings (gear app), under "Privacy & Security", quite far down, there is the option "Open anyway". After confirming twice with "Open anyway" the installation program can then be executed.
The further procedure corresponds to the command-line program under Windows, see above.
Installation on Linux (CLI)
For the Linux operating system the program "FA-VA6_Firmware_Update_2-0_Linux_CLI.tar.gz" can be downloaded and used.
After downloading the archive must be extracted in the Downloads folder by double-clicking it. The program is extracted next to the archive; however it cannot be started by double-clicking, but only via the console. To do this a terminal must be opened, then the Downloads folder must be navigated to and the program must be started with a preceding "./".
Depending on the Linux version an error message may appear stating that the connection to the attached FA-VA6 is not possible, because the user does not have the permissions to access the serial interface to the FA-VA6. The message provides possible solutions and the necessary commands: either run the installation program once as the dialout user, or add the current user to the dialout group. Alternatively, running the installation program once as superuser with "sudo" is also possible.
The further procedure corresponds to the command-line program under Windows, see above.
Procedure in case of installation interruption
The FA-VA6 cannot be damaged if the installation is interrupted (for example by accidentally unplugging the USB cable), no data stored in the FA-VA6 is lost and the installation can be restarted.
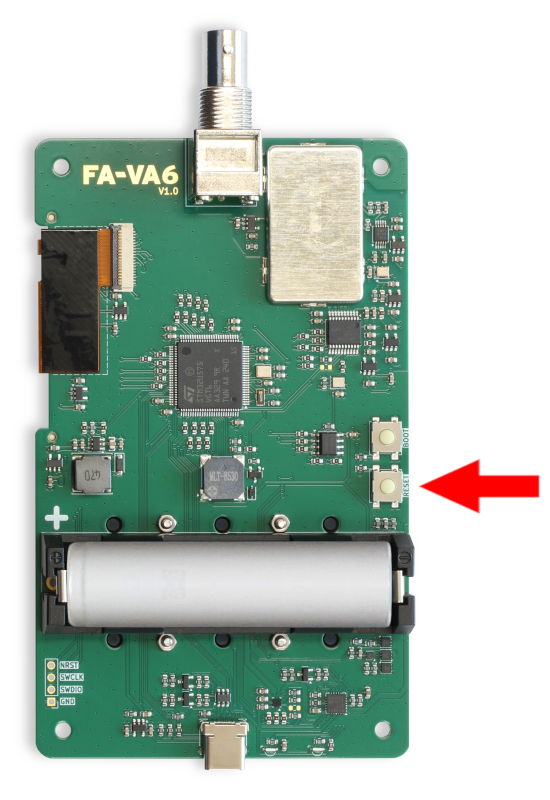
If restarting the installation fails with a corresponding message, then the FA-VA6 must be restarted by briefly pressing the reset button.
The reset button is located on the underside of the circuit board at the very edge in the center (see photo) and is labeled "RESET". The circuit board does not need to be removed from the lower enclosure, as the reset button is easily accessible even when the circuit board is installed.
After briefly pressing the reset button the installation can then be completed successfully.